この記事では Pixi.jsを使ってブラウザで動く簡単な2Dゲームを作ってみたいと思います。 爆弾を設置して敵を倒す、某爆弾男ゲームのようなシステムを作ってみようかと。 あくまで簡易的な。
の続きです。
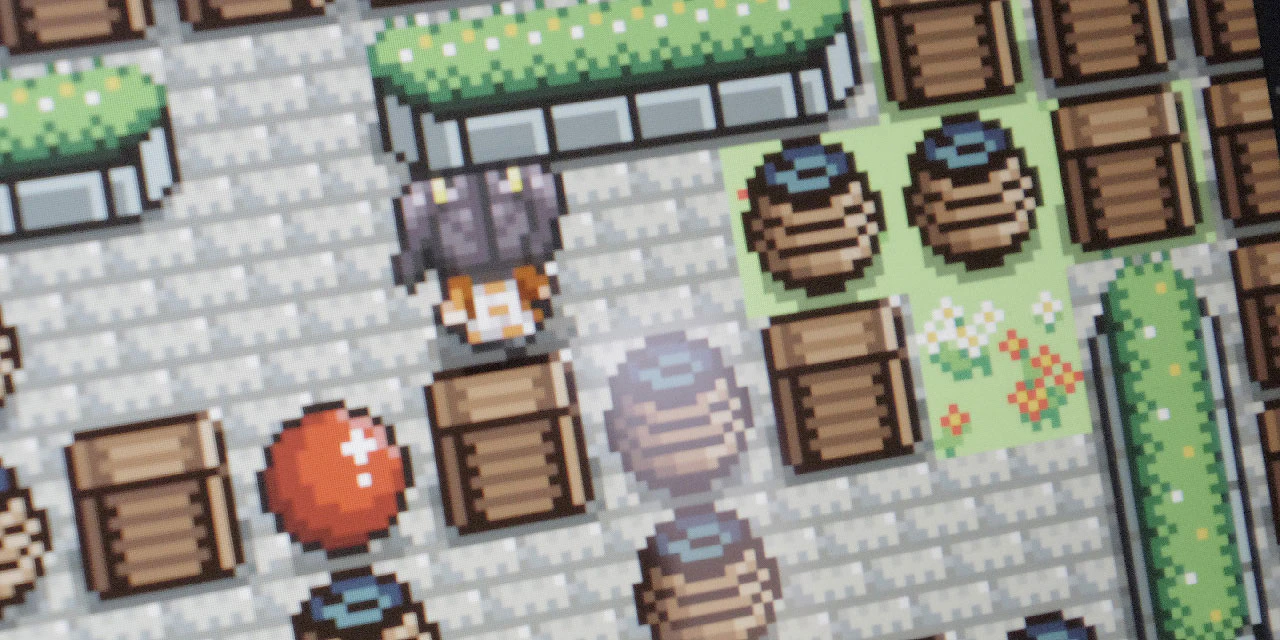
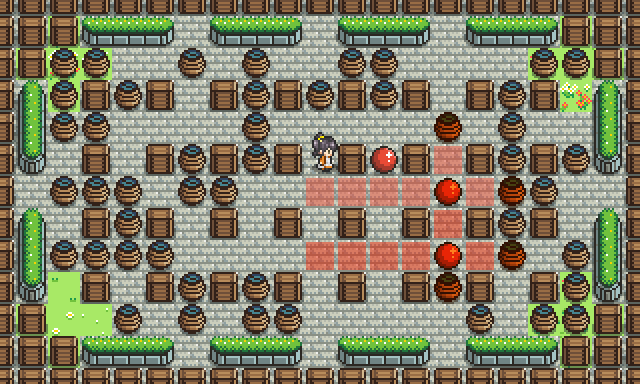
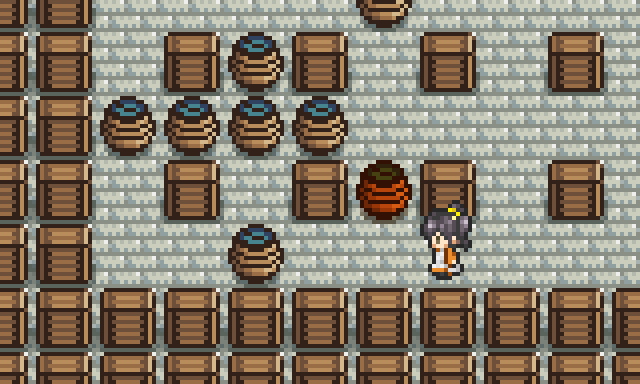
今回は↓こんな感じまで進みました。
vol.4 完了時のコードは下記に。
bomber_maid [Branch: pixi-game-04]
正直な所、 prototype、 コンストラクタ、 インスタンス、 継承・・・etc、 今まであまり理解せずに騙し騙しコードを書いてきましたが、 ようやく理解ができました……。 偶然TSUTAYAで見つけた、 「ゲームで学ぶJavaScript入門」 田中賢一郎(著) を買って冬休みに読んでいましたが、非常にわかりやすい。 これ読んでvol.3のコードも結構修正しました。
今まで伸び悩んでたJSの学習が一気に進みそうです。 JSビギナーの方にオススメ。
OUTLINE
- ブロックを生成する Unitクラス / Blockクラス
- 爆弾を生成する Bombクラス
- ビット演算によるフラグ管理
- メインループについて
ブロックを生成する Unitクラス / Blockクラス
継承 がようやく理解できそうなので使ってみました。 Unitクラス はグリッド上に配置するオブジェクトを生成します。 そして、そのクラスを継承した Blockクラス は更に destroyメソッド 等を追加したオブジェクトになります。
Unit.js
/**
 * @fileoverview Unit
 * @constructor
 * @param gridX {Number}
 * @param gridY {Number}
 * @param texture {Object}
 * @param container {Object}
 */

'use strict';

// ================
//     MODULE
// ================

var Config = require('./Config');


// ================
//   CONSTRUCTOR
// ================

var Unit = function (gridX, gridY, texture, container) {

  this.gridX      = gridX;
  this.gridY      = gridY;

  this._texture   = texture;
  this._container = container;

  this._init.apply(this);

};

module.exports = Unit;


// ================
//     CONSTANT
// ================


// ================
//      METHOD
// ================

/**
 * 初期化
 * @method _init
 */
Unit.prototype._init = function () {

  this.elm = new PIXI.Sprite(this._texture);

  this.elm.anchor.set(0.5, 1);
  this.elm.position.set(Config.UNIT_SIZE * this.gridX + Config.UNIT_SIZE / 2, Config.UNIT_SIZE * (this.gridY + 1))
  this._container.addChild(this.elm);

};


/**
 * テクスチャのセット
 * @method setTexture
 */
Unit.prototype.setTexture = function (texture) {

  this.elm.texture = texture;

};
Blockクラス
ソフトブロックやハードブロックなどはこのクラスから生成します。
Block.prototype.destroy のなかで、 this.elm.tint というプロパティを使用しています。 これは PIXI.Sprite の色合いを変更するもので、 0x000000 のような色の値を取ります。
画像1枚だけで、色味を変えられて非常に便利です。
たとえば単色のアイコンが複数枚必要な場合、白いPNG画像に tint で任意の色を指定すると、指定色単色のアイコンができたり。
Block.js
/**
 * @fileoverview Block
 * @constructor
 */

'use strict';

// ================
//     MODULE
// ================

var Config = require('./Config'),
    Unit   = require('./Unit');


// ================
//   CONSTRUCTOR
// ================

var Block = function () {

  Unit.apply(this, arguments);

  this.isDestructible = false;
  this._setStatus();

};

module.exports = Block;

Block.prototype = Object.create(Unit.prototype);
Block.prototype.constructor = Block;


/**
 * ステータス設定
 * @method _setStatus
 */
Block.prototype._setStatus = function () {

  if (Config.blockStatus[this.gridY][this.gridX] === 2) {
    this.isDestructible = true;
  }

  Config.blockStatus[this.gridY][this.gridX] = this;

};


/**
 * ブロックの破壊
 * @method vanish
 */
Block.prototype.vanish = function (delay) {

  var delay = delay || 0;

  setTimeout(function () {
    this.elm.tint = 0xff7e1f;

    TweenMax.to(this.elm, .8, {
      alpha: 0,
      onComplete: function () {

        this.elm.destroy();
        Config.blockStatus[this.gridY][this.gridX] = 0;

      }.bind(this)
    });

  }.bind(this), delay);

};
こんな感じで、 オレンジ系の色味に変更したあと、 TweenMax で透明度をアニメーションさせて要素を消しています。
爆弾を生成する Bombクラス
ようやくゲームの特徴となる爆弾設置について書いていきます。
- 任意の位置に爆弾スプライトを生成
- 一定の時間アニメーションを繰り返す(拡大←→縮小みたいなやつ)
- 爆風の強さ分だけ爆風スプライトを進める
- 空きがある場合、爆風を描画 → さらに爆風は1コマ進む
- キャラクターがいる場合、ミス扱い → さらに爆風は1コマ進む
- ブロック(ソフト)がある場合、爆風は描画せずストップ、該当ブロックを破壊
- ブロック(ハード)がある場合、爆風は描画せずストップ
とりあえずは 位置情報 と 爆風の強さ で。 爆弾もグリッドに沿って配置するので、 Bombクラス は Blockクラス を継承します。
Bomb.js
/**
 * @fileoverview Bomb
 * @constructor
 */

'use strict';

// ================
//     MODULE
// ================

var Config = require('./Config'),
    Block   = require('./Block');


// ================
//   CONSTRUCTOR
// ================

var Bomb = function () {

  Block.apply(this, arguments);

  this.strength = 4;
  this._bombAnimation();

};

module.exports = Bomb;

Bomb.prototype = Object.create(Block.prototype);
Bomb.prototype.constructor = Bomb;


// ================
//     CONSTANT
// ================

Bomb.DURATION = 3000;


// ================
//      METHOD
// ================

/**
 * アニメーション
 * @method _bombAnimation
 */
Bomb.prototype._bombAnimation = function () {

  this._tween = TweenMax.to(this.elm.scale, .5, {
    x: 0.9,
    y: 0.9,
    repeat: -1,
    yoyo: true,
    ease: SteppedEase.config(1)
  });

  setTimeout(function () {
    this._explosion();
    Config.blockStatus[this.gridY][this.gridX] = 0;
  }.bind(this), Bomb.DURATION);

};


/**
 * 爆発
 * @method _explosion
 */
Bomb.prototype._explosion = function () {

  var FLAG_CONTINUE = 1, // 爆風が続くかどうか
      FLAG_DESTROY  = 2, // 爆風で破壊するかどうか
      flags,
      blasts = [], // 爆風ユニット
      i,
      j,
      tt = PIXI.Texture.fromFrame('explosion-0'),
      explosionContainer = new PIXI.Container(),
      /**
       * 座標のブロックの状態をチェック
       * @function checkUnit
       */
      checkUnit = function (x, y) {

        var mask = 0;

        if (0 <= x && x < Config.HORIZONTAL_UNIT &&
            0 <= y && y < Config.VERTICAL_UNIT) {
          if (Config.blockStatus[y][x] <= 0) {
            mask |= FLAG_CONTINUE;
            return mask;
          } else  if (Config.blockStatus[y][x].isDestructible) {
            mask |= FLAG_DESTROY;
            return mask;
          }
        }

        return mask;

      };

  Config.numOfBomb++;

  this._tween.pause();
  this.elm.tint = 0xff7e1f;

  TweenMax.to(this.elm, .8, {
    alpha: 0,
    onComplete: function () {
      this.elm.destroy();
    }.bind(this)
  });

  /**
   * 上下左右に爆風を伸ばす
   */
  for (i = 0; i < 4; i++) {

    blasts[i] = [];

    for (j = 1; j <= this.strength; j++) {

      var x = i === 0 ? this.gridX - j:
              i === 1 ? this.gridX:
              i === 2 ? this.gridX + j:
              i === 3 ? this.gridX:
              0;

      var y = i === 0 ? this.gridY:
              i === 1 ? this.gridY - j:
              i === 2 ? this.gridY:
              i === 3 ? this.gridY + j:
              0;

      blasts[i][j] = 0;

      flags = checkUnit(x, y);
      console.log(flags);
      if ((flags & FLAG_DESTROY) != 0) {
        Config.blockStatus[y][x].vanish();
      }

      if ((flags & FLAG_CONTINUE) != 0) {

        blasts[i][j] = new Block(x, y, tt, explosionContainer);
        blasts[i][j].vanish(500);

      } else {

        break;

      }

    }
  }

  /**
   * 爆風スプライトを一定時間後に消去
   */
  this._container.addChild(explosionContainer);


};
Bomb.prototype.explosion の組み立てに苦戦した…………。
ビット演算によるフラグ管理
/**
 * 座標のブロックの状態をチェック
 * @function checkUnit
 */
checkUnit = function (x, y) {

  var mask = 0;

  if (0 <= x && x < Config.HORIZONTAL_UNIT &&
      0 <= y && y < Config.VERTICAL_UNIT) {
    if (Config.blockStatus[y][x] <= 0) {
      mask |= FLAG_CONTINUE;
      return mask;
    } else  if (Config.blockStatus[y][x].isDestructible) {
      mask |= FLAG_DESTROY;
      return mask;
    }
  }

  return mask;

};
ここでは ビット演算 でフラグ管理をしてみました。 checkUnit(x, y) は任意の座標上にあるブロックの状態を調べる関数、 その返り値は調べた結果になります。 結果として欲しいのは、 爆風は次のコマに進むのかどうか と 爆風でそのブロックは破壊するのかどうか です。 一つのフラグであれば boolean を返せばいいのですが、複数の boolean を返して欲しい時にビット演算を使うと便利でした。
結果として返す値を2進数とした場合に、 特定の桁が 1 か 0 かで true or false と判断します。 今回の場合、 1桁目で 爆風は次のコマに進むのかどうか 、 2桁目で 爆風でそのブロックは破壊するのかどうか ですね。 2つのフラグ × 2つの状態(真偽)で場合分けとしては4通りですが、これが 00(どっちも偽) or 01(1桁目は真、2桁目は偽) or 10(1桁目は偽、2桁目は真) or 11(どっちも真) となります。 フラグを立てるための定数、
var FLAG_CONTINUE = 1, // 爆風が続くかどうか
    FLAG_DESTROY  = 2, // 爆風で破壊するかどうか
を使って、 初期値0 としている mask でフラグを管理します。
爆風を続ける場合は、
mask |= FLAG_CONTINUE;
爆風で破壊する場合は、
mask |= FLAG_DESTROY;
とします。 最後に mask を return。 返す時は10進数なので、 0 or 1 or 2 or 3 です。
返ってきた値から、 フラグが立っているかどうか調べるには
if ((flags & FLAG_DESTROY) != 0) {
      // 破壊するフラグが立っている
}
です。
しれっとチップを増やしました。
メインループ
ゲームのようなリアルタイム性が求められるプログラミングでは メインループ のような常に何かを描画したり監視したりする関数を用いるらしい。 今作ってるゲームだと、 レンダリングや入力状態を管理するために window.requestAnimationFrame を使ってる箇所とかはまさにそれでした。
/**
 * レンダリング
 * @method _rendering
 */
Stage.prototype._rendering = function () {
  var animation = function () {

    requestAnimationFrame(animation);
    this.renderer.render(Config.stage);

  }.bind(this);

  animation();

};
上記のような前回の記述は、一箇所にまとめました。
/**
 * 入力を常時監視
 * @method _checkInput
 */
Controller.prototype._checkInput = function () {

  /**
   * 矢印キーのチェック
   */
  var check = function () {
    requestAnimationFrame(check);

    if (this._keyStatus[Controller.KEY_LEFT]) {
      Config.character.move('left');
    }
    if (this._keyStatus[Controller.KEY_UP]) {
      Config.character.move('up');
    }
    if (this._keyStatus[Controller.KEY_RIGHT]) {
      Config.character.move('right');
    }
    if (this._keyStatus[Controller.KEY_DOWN]) {
      Config.character.move('down');
    }
  }.bind(this);

  check();

};
通行不能がまだできてませんが、 爆弾で破壊できるところまでできた。
あと爆風の連鎖ですが、 前ページの checkUnit() で、 座標上に爆弾があるかどうか を追加すると実現できそう。
vol.4はここまで。 続きは Pixi.js でゲームを作ってみる vol.5 から。